How to Fill Holes in the Wall to Get Your Security Deposit Back
You’ve given your notice to the landlord and have begun the packing process. As you take down your family photos and wall art, the nail holes left behind become alarmingly front and center. Left untouched, you may not get your security deposit returned. Learn how to fill holes in walls before your move and have your security deposit back in your hands.
How to fill nail holes in walls, step by step:
Step 1: Remove any loose paint around the hole.
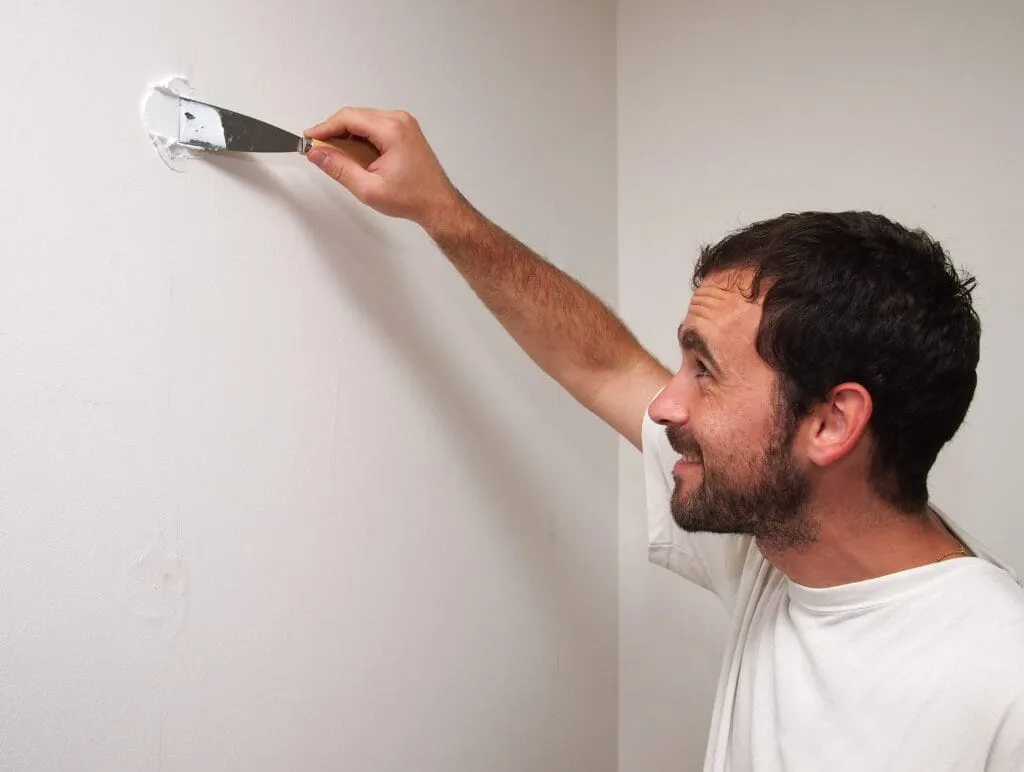
As you remove the nail, some of the surrounding paint may chip off. It's important to prep the area by lightly sanding away any loose paint. Use 150 grit sandpaper to create an even surface. If the nail comes out cleanly and the adjacent paint is intact, go directly to Step 2. If the nail doesn't come out cleanly and some of the drywall pops out, gently tap the area with a hammer or the handle of your spackle knife to flatten any bumps.Step 2: Apply a layer of spackle.
Spackle, also known as compound or putty, is a wall paste. With your spackle knife, apply a thin layer of spackle compound onto the nail hole at a 45-degree angle. Make sure the spackle has filled the nail hole.Step 3: Allow the spackle to dry completely.
Take care of your other pre-move repairs as you let your spackle dry for approximately one hour. If the weather is humid, this may take a bit longer.Step 4: Scrape away excess spackle.
If there is excess spackle around the nail hole (there may be a thin line from when it was applied), take your spackle knife and align it to the wall. Slowly scrape the excess away.Step 5: Gently sand the spackled area.
Part of learning how to fill holes in walls that have been damaged is to eliminate any uneven areas. Use a 150 grit sandpaper (fine grit) to smooth out the spackled area for a seamless look.Step 6: Apply a second coat of spackle
If the nail hole is still visible, apply a second coat of spackle, following Steps 2 - 5.Step 7: Paint the area.
Once your final sanding is complete and the nail hole has been filled, it’s time to touch up the area to blend in with the existing wall paint. Using a small paintbrush, apply paint to the spackled area in light strokes. Spot painting the filled nail hole should be sufficient. However, if the wall has a considerable amount of nail holes (for example, from a gallery wall), it may be necessary to paint the entire wall. Pro-tip for fixing large holes: Fixing large holes in your wall is a bit more labor-intensive. You’ll need a mesh wall patch cut to fit over the hole (with some overlap), a spackle knife and spackle compound, and sandpaper. Let the spackle fully dry and gently sand. Be sure not to sand too harshly that the mesh wall patch shows through. Paint the area you’ve repaired with the matching wall paint.Products and tools you’ll need to cover nail holes in walls:
- Sandpaper: A fine-grit sandpaper or sanding block smoothes out the spackle, so the nail hole is no longer visible. Choose a 150 grit for a uniform finish.
- Spackle compound: When you spec out how to fill nail holes in drywall, spackle compound is a must-have on your list.
- Spackle knife: A spackle knife allows an even application of spackle.
- Paint and paintbrush: Touch up the spackled area with a small amount of paint that matches the existing color. Use a 1-inch brush to keep the paint application to the repair area.